Kingflex
Choosing Wall Heat Insulation in 2026 requires more than comparing advertised R-values. Climate, moisture, fire safety, durability, and installation quality all influence real performance. According to the International Energy Agency’s Energy Efficiency 2023 report, buildings consume about 30% of global final energy. They also produce roughly 26% of energy-related emissions. The United Nations Environment Programme’s 2023 Global Status Report presents similar concerns about building energy demand and carbon emissions. These figures make insulation a practical climate decision, not merely a renovation detail.
Joseph Lstiburek, a leading building scientist and founder of Building Science Corporation, stated, “The perfect wall has to be perfect from the outside in.” His principle remains useful in 2026. A wall in a rainy coastal city needs different protection than one in a dry, freezing region. Mineral wool may offer strong fire resistance. Wood fiber can support lower-impact construction. Closed-cell foam can reduce air leakage, but it requires careful moisture planning. No material wins everywhere.
This guide will examine thermal conductivity, whole-wall R-value, vapor control, embodied carbon, service life, and installation risks. It will also consider product declarations, including Environmental Product Declarations and tested fire classifications. A small site detail matters. A two-millimeter gap around a window can undermine expensive insulation. That reality is easy to overlook.
The honest answer is less tidy. Laboratory ratings do not always match occupied buildings. Manufacturer claims also require verification. Homeowners should compare independent testing, local codes, climate data, and qualified installation advice before choosing Wall Heat Insulation.
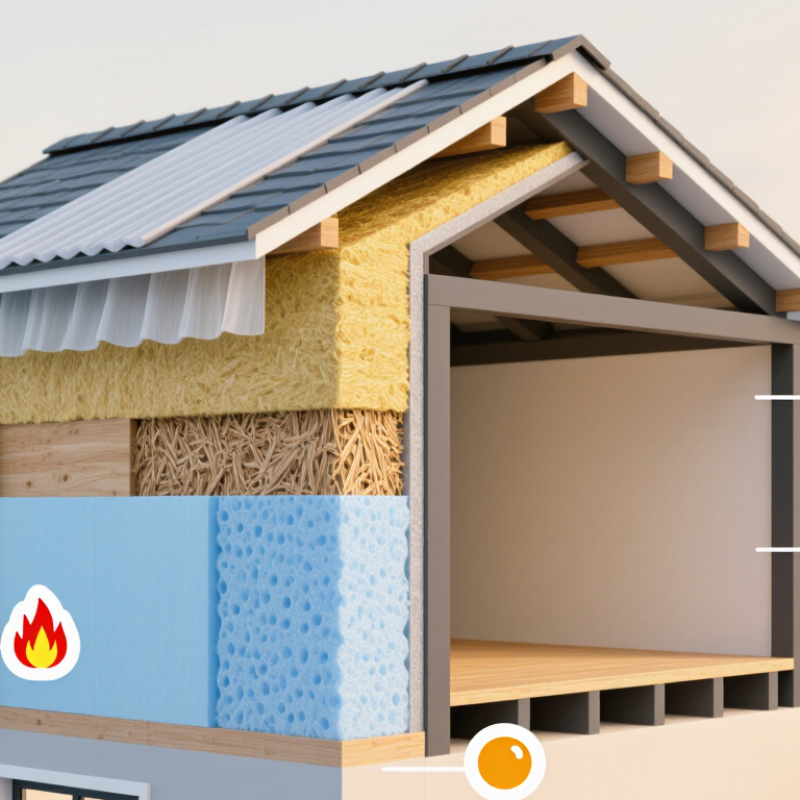
Wall heat insulation slows heat transfer through the building envelope. In winter, it helps retain warmth indoors. In summer, it limits heat entering the rooms. By 2026, energy prices, extreme summer temperatures, and tighter building rules make this layer more important than before. A well-insulated wall keeps indoor surfaces warmer in winter and cooler in summer. This improves comfort and can reduce heating and cooling demand.
However, insulation does not work alone. Air movement matters. Heat loss often travels through studs, concrete edges, window reveals, and poorly sealed joints. These thermal bridges can create cold patches, condensation, and eventually mold. Moisture is unforgiving. Trapped water lowers performance and may damage timber, plaster, or masonry.
Choosing insulation means evaluating the entire wall, not only the product thickness. Check its declared thermal conductivity, expected R-value, moisture behavior, fire classification, and service life. Local building codes should guide minimum performance, especially in fire-sensitive or damp constructions. An experienced installer should examine the existing wall before recommending internal or external insulation. On site, small gaps around outlets and corners often matter more than impressive laboratory numbers. Seams need careful fitting. For older buildings, a moisture assessment can prevent an expensive mistake. I would also request independent test data, installation records, and a clear condensation-risk calculation. Those checks sound cautious, perhaps too cautious. Yet comfort, durability, and indoor air quality depend on details hidden behind the finish.
How to Choose Wall Heat Insulation in 2026?
Assessing a wall’s insulation needs starts with its climate, structure, and current performance. The International Energy Agency reports that buildings used about 30% of global final energy in 2022. Poor wall insulation remains a practical source of heat loss.
Check the wall’s U-value, not just its insulation thickness. A lower U-value means better thermal resistance. Compare the result with local energy codes and climate-zone targets. Inspect thermal bridges around windows, floor edges, and concrete columns. A thermal camera can reveal cold patches, while a blower-door test can identify unwanted air leakage. Moisture deserves equal attention. A damp wall may lose performance and develop hidden damage. My own first assumption was simple: thicker insulation must be better. It was not always true. Poor ventilation and trapped moisture created new risks.
Tips: Record indoor humidity, wall temperature, and outdoor conditions for several days. Ask a qualified building professional to assess condensation risk before choosing materials. Review the U.S. Department of Energy’s building-envelope guidance and the 2023 Global Status Report for Buildings and Construction. These sources support energy-based decisions, but local construction rules still control the final design. Check twice. A small measurement error can change the insulation strategy.
This chart compares the approximate thermal resistance of a 100 mm insulation layer. Higher R-values indicate better resistance to heat flow, while lower thermal conductivity generally provides better insulation performance with the same thickness.
Values are representative calculations based on typical thermal conductivity at approximately 20°C using R = thickness ÷ thermal conductivity. Actual performance depends on density, moisture, installation quality, thermal bridging, air leakage, wall construction, and the local climate-zone requirements.
How to Choose Wall Heat Insulation in 2026?
Wall insulation should match the wall, not just the climate. A material that performs well in one assembly may trap moisture in another. Check the wall’s age, exposure, drainage, and existing dampness before selecting insulation. I have seen small moisture problems become expensive repairs after rushed retrofits. No material wins everywhere.
For solid brick or concrete walls, mineral wool or wood-fiber boards can support exterior insulation systems. They allow careful moisture management and reduce cold surfaces indoors. Rigid foam boards offer strong thermal performance where wall space is limited. However, joints must be sealed accurately, or heat will escape through narrow gaps. Concrete walls also need proper anchors and a durable weather layer.
Timber-frame walls usually suit mineral wool, cellulose, or wood fiber between studs. These materials can improve sound control and fill irregular spaces. Cellulose needs correct density and moisture protection. For cavity walls, blown insulation may work when the cavity is continuous and dry. It may fail around debris, narrow gaps, or damaged mortar. Below-grade walls often require moisture-resistant insulation, such as closed-cell boards, with protected drainage details. Local fire rules, vapor-control requirements, and calculated U-values should guide the final design. Even experienced installers can overlook thermal bridges around windows and floor edges. That detail still needs checking.
Thermal performance should be measured beyond the advertised R-value. Check conductivity, thickness, moisture resistance, and thermal bridging at joints. The U.S. Energy Information Administration reported that space heating represented 42% of household energy use in its 2020 Residential Energy Consumption Survey. A well-fitted wall can reduce heat loss, but poor installation can undermine excellent materials. Small gaps matter.
Safety requires evidence, not assumptions. Review fire classification, smoke behavior, water resistance, and compatibility with nearby materials. Local building codes remain essential because requirements vary by climate and construction type. The National Fire Protection Association recorded 1.5 million U.S. fires in 2022, including residential incidents. This figure does not prove insulation caused them, but it supports careful detailing around penetrations and electrical services. Safer design may cost more initially.
Cost comparisons should include labor, maintenance, replacement, and energy savings. The International Energy Agency and UNEP reported that buildings used about 30% of global final energy in 2022. Sustainability also needs a wider lens. Request an environmental product declaration, recycled-content data, and a realistic service-life estimate. Embodied carbon can be overlooked when comparing only operational savings. I have found that tidy spreadsheets often miss moisture repairs and disposal costs. That weakness deserves attention. A modestly priced system may become expensive after one failed installation.
How to Choose Wall Heat Insulation in 2026?
Plan insulation around climate, wall exposure, moisture, and heating habits. The International Energy Agency reports that buildings use about 30% of global final energy. Better envelopes can reduce heating demand, but thicker insulation is not always better. Check the wall assembly, local U-value targets, fire requirements, and available cavity depth. A simple heat-loss calculation is essential. It should include windows, corners, floor junctions, and thermal bridges. These details often decide real performance.
Tips: Request product test data, not only marketing claims. Confirm declared thermal conductivity, moisture behavior, density, and fire classification. During installation, keep boards tightly fitted. Seal gaps around outlets, pipes, and window frames. Do not compress flexible insulation excessively. A small open joint can create a cold stripe across the room. I have seen clean-looking walls fail for this reason.
Verification needs evidence. Use installation photographs, batch records, and a checklist before closing the wall. Infrared scanning can reveal missing areas, but it requires a suitable temperature difference. The U.S. Department of Energy notes that air sealing and insulation work together; insulation alone cannot stop uncontrolled air movement. A blower-door test can measure leakage, while surface-temperature checks can identify suspicious cold spots. The process is not perfect. Thermal cameras can mislead, and site conditions change. Review the results with an experienced building professional before accepting the work.
A practical comparison and verification guide for selecting wall insulation by thermal performance, moisture control, fire safety, installation method, and lifecycle considerations.
| Decision Area | Recommended Planning Target | Typical Data or Range | Installation Guidance | Verification Method |
|---|---|---|---|---|
| Thermal conductivity | Choose the lowest practical design conductivity for the available wall thickness. | Mineral wool: approximately 0.032–0.044 W/m·K Expanded polystyrene: approximately 0.031–0.040 W/m·K Polyurethane or polyisocyanurate: approximately 0.020–0.028 W/m·K Wood-fiber insulation: approximately 0.038–0.050 W/m·K |
Use the declared design value at the expected temperature and moisture condition, not only the laboratory value. | Check the product declaration, technical datasheet, and installed thickness. Recalculate the wall U-value using the actual assembly. |
| Insulation thickness | Size the insulation to meet the project’s energy code, climate zone, and target U-value. | Common wall insulation thickness: 75–200 mm Approximate insulation-only R-value at 0.035 W/m·K: 2.1 m²·K/W at 75 mm; 4.3 m²·K/W at 150 mm; 5.7 m²·K/W at 200 mm |
Install the specified thickness continuously. Do not compress flexible batts or leave unplanned gaps around services. | Measure random locations with a ruler or depth probe before closing the wall. Record areas with reduced thickness. |
| Whole-wall thermal performance | Evaluate the complete wall, including framing, fasteners, cavities, windows, slabs, and junctions. | A wall U-value is commonly expressed in W/m²·K; lower values indicate lower heat flow. Thermal bridges can significantly reduce performance even when cavity insulation is thick. | Use continuous exterior insulation where practical to reduce thermal bridging through studs and structural members. | Review energy calculations or two-dimensional thermal-bridge details. Use infrared imaging only with an adequate indoor–outdoor temperature difference. |
| Moisture and vapor control | Prevent rain penetration, air leakage, and harmful interstitial condensation. | A wall assembly should be assessed for local climate, indoor humidity, vapor permeability, drying direction, and wind-driven rain exposure. | Keep insulation dry, maintain drainage paths, seal penetrations, and install membranes in the location required by the assembly design. | Inspect membrane laps and penetrations. Confirm the assembly with a hygrothermal analysis where condensation risk is significant. |
| Air sealing | Create a continuous air-control layer across the entire wall system. | Air leakage can bypass insulation and transport moisture. The required airtightness level depends on the applicable building standard. | Seal joints, corners, window interfaces, service penetrations, electrical boxes, and wall-to-floor or wall-to-roof connections. | Use a blower-door test where applicable. Trace leakage with smoke pencils or pressure-assisted inspection. |
| Fire performance | Select insulation and wall coverings according to the building height, occupancy, compartmentation, and local fire regulations. | Non-combustible mineral wool is commonly used where higher fire resistance is required. Foam products require code-compliant thermal and fire protection. | Protect combustible insulation with the specified lining, cavity barriers, fire stops, and perimeter seals. | Check product classification, tested wall-system documentation, fire-stop locations, and installation photographs. |
| Acoustic performance | Use insulation as part of a complete sound-control system rather than as a standalone solution. | Dense, porous batts can improve cavity absorption. Sound transmission also depends on wall mass, decoupling, airtightness, and flanking paths. | Fit batts tightly around framing without voids. Avoid rigid contact bridges where resilient or separated framing is specified. | Inspect cavity coverage and test the completed wall using the project’s acoustic rating procedure when required. |
| Substrate and surface condition | Start with a sound, clean, dry, and structurally suitable substrate. | Existing walls should be checked for cracks, dampness, salts, mold, loose coatings, and structural movement before insulation is added. | Repair leaks and defects first. Do not cover active moisture problems or unstable masonry. | Document the pre-installation condition with photographs, moisture readings, and repair records. |
| Fit and continuity | Minimize gaps, compression, edge shrinkage, and thermal bypasses. | Even small uninsulated areas can create localized cold surfaces and increase heat loss or condensation risk. | Cut batts accurately, stagger board joints, tightly fit corners, and coordinate insulation with structural and mechanical components. | Perform a pre-cover inspection using a checklist and marked-up wall elevations. |
| Fasteners and attachment | Use an attachment system compatible with the insulation, substrate, wind load, and cladding. | Fastener spacing and embedment vary by system and must be designed for the substrate and façade loads. | Install fasteners at the specified spacing and avoid overdriving, which can reduce board thickness or damage the facing. | Check fastener type, spacing, embedment, washer seating, and pull-out results where specified. |
| Window and door interfaces | Treat openings as high-priority thermal, air, and water-control junctions. | Frames, sills, heads, and jambs can become thermal bridges if insulation and membranes are discontinuous. | Return insulation to openings where designed and integrate sill drainage, flashing, air seals, and weather seals. | Inspect each opening before covering. Conduct water testing when exposure or project specifications require it. |
| Construction moisture protection | Keep materials protected from precipitation and ground moisture throughout storage and installation. | Wet insulation may lose thermal performance temporarily or permanently, depending on the material and drying conditions. | Store materials off the ground, cover them with breathable protection, and replace damaged or saturated products. | Record delivery condition and use moisture measurements before enclosing moisture-sensitive assemblies. |
| Health and safe handling | Follow the safety data sheet and site risk assessment for cutting, dust, fibers, adhesives, and sealants. | Typical controls include gloves, eye protection, suitable work clothing, ventilation, and respiratory protection where required. | Cut materials in a controlled area, limit airborne dust, and dispose of offcuts according to local requirements. | Verify worker training, protective equipment, ventilation, and housekeeping during site inspections. |
| Final thermal verification | Confirm that the installed wall performs as designed before practical completion. | Useful evidence includes insulation records, airtightness results, thermal-bridge review, and completed inspection checklists. | Close the wall only after concealed work has been inspected and documented. | Use blower-door testing, thermography under suitable conditions, visual inspection, and document review as appropriate. |
Record the climate, wall construction, orientation, indoor humidity, and heating habits. Measure wall temperature and outdoor conditions for several days. Also note windows, corners, floor edges, and concrete columns. Small gaps can matter more than expected.
U-value measures heat transfer through the wall assembly. Lower values generally indicate better thermal resistance. Do not judge performance by thickness alone. Compare calculated values with local climate targets and energy codes.
Inspect window frames, floor junctions, corners, outlets, and structural columns. A thermal camera may show cold patches. It needs enough temperature difference. The image can mislead, so verify suspicious areas professionally.
Damp walls can lose thermal performance and hide structural damage. Check humidity, stains, odors, and surface temperatures. Assess condensation risk before selecting materials. Thicker insulation may trap moisture when ventilation is poor. This risk is easy to underestimate.
Include wall area, windows, corners, floor junctions, thermal bridges, and air leakage. Heating habits also influence energy demand. A simple calculation helps, but it is not perfect. Review unusual results with a qualified building professional.
Fit boards tightly, without open joints or excessive compression. Seal areas around pipes, outlets, and window frames. A narrow gap can create a cold stripe indoors. Keep materials dry during installation. Clean-looking work can still fail.
Request tested data for thermal conductivity, density, moisture behavior, and fire classification. Confirm that declared values match the proposed material. Marketing language is not enough. Ask about installation limits and required cavity depth.
Keep installation photographs, material batch records, and a completion checklist. Use infrared scanning when indoor and outdoor temperatures differ sufficiently. A blower-door test can measure unwanted air leakage. Surface-temperature checks may reveal suspicious cold spots. The evidence may still be incomplete. Review results professionally.
In 2026, Wall Heat Insulation is an essential part of creating energy-efficient, comfortable, and resilient buildings. It helps reduce heat transfer through walls, supports more stable indoor temperatures, lowers energy demand, and can improve protection against moisture, noise, and fire when properly designed. Choosing the right solution begins with assessing the wall’s structure, climate exposure, moisture conditions, existing insulation, ventilation, and thermal performance requirements.
Different wall types may require different insulation approaches, so material selection should balance thermal efficiency, safety, durability, cost, environmental impact, and installation conditions. A practical plan should include accurate measurements, suitable moisture and vapor control, careful detailing around openings and joints, and qualified installation. After completion, the work should be checked for gaps, thermal bridges, surface problems, and overall performance. With thoughtful planning and verification, Wall Heat Insulation can improve long-term building comfort, reduce operating costs, and support more sustainable construction.
